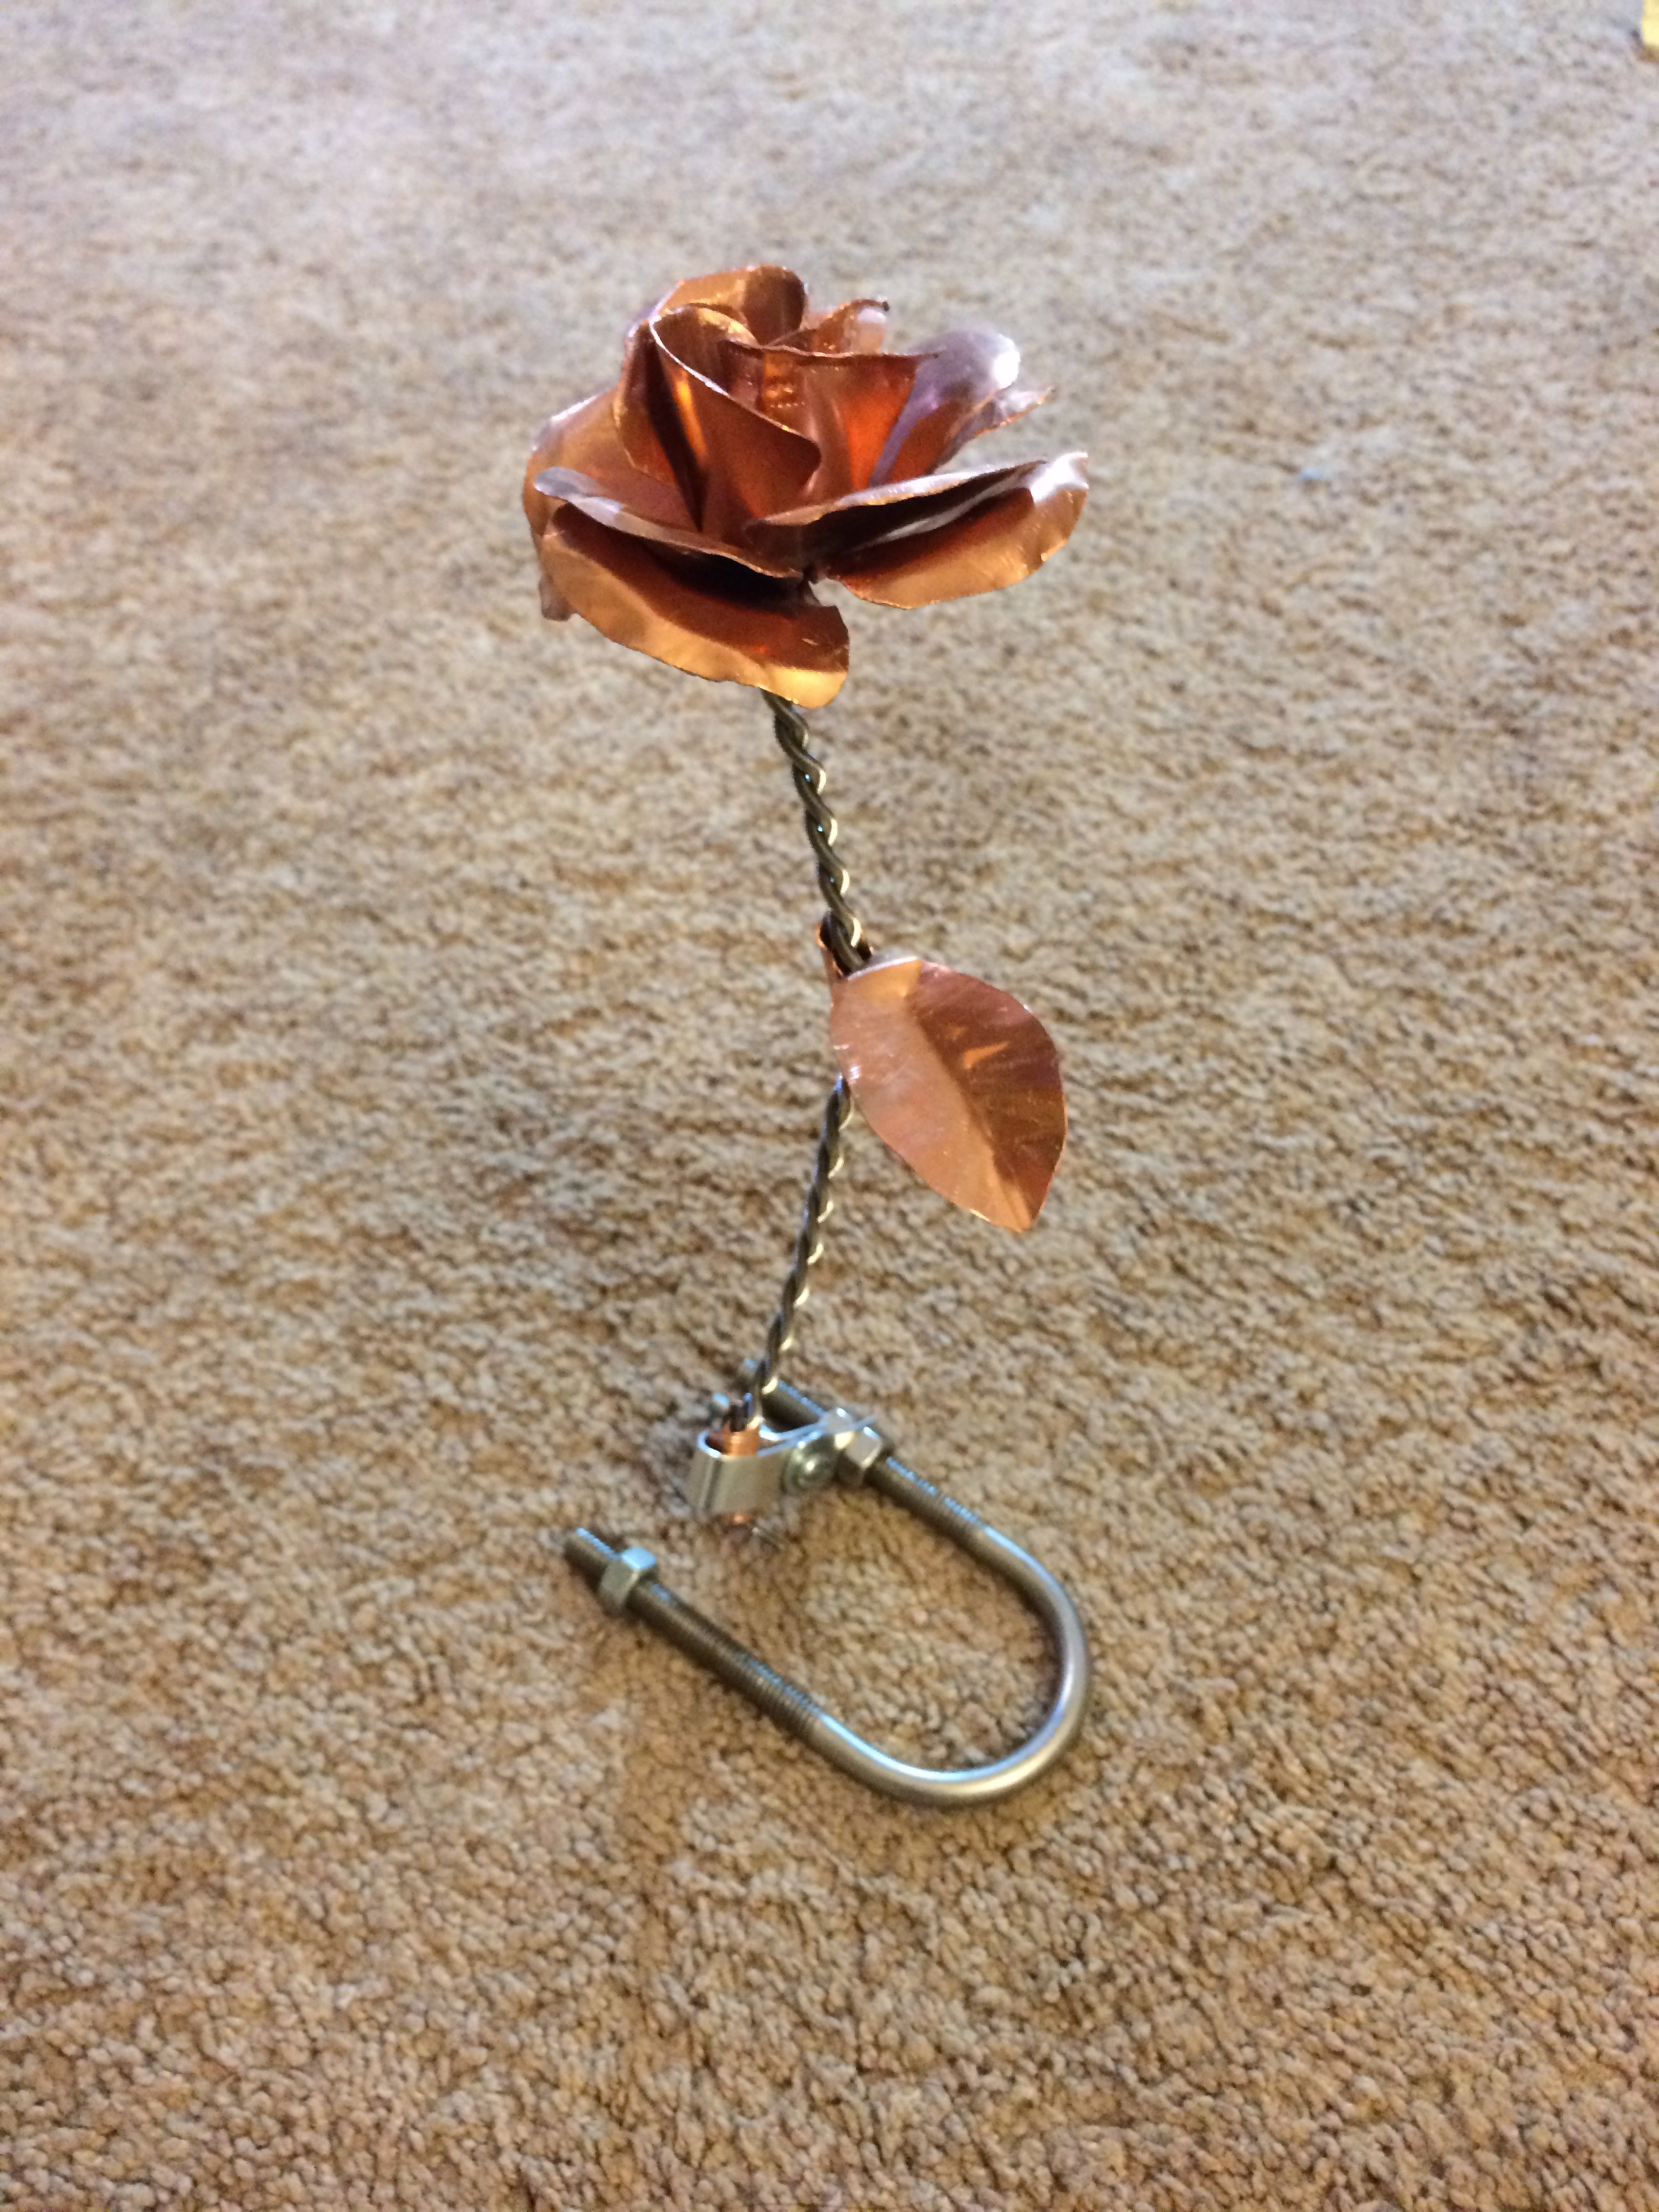
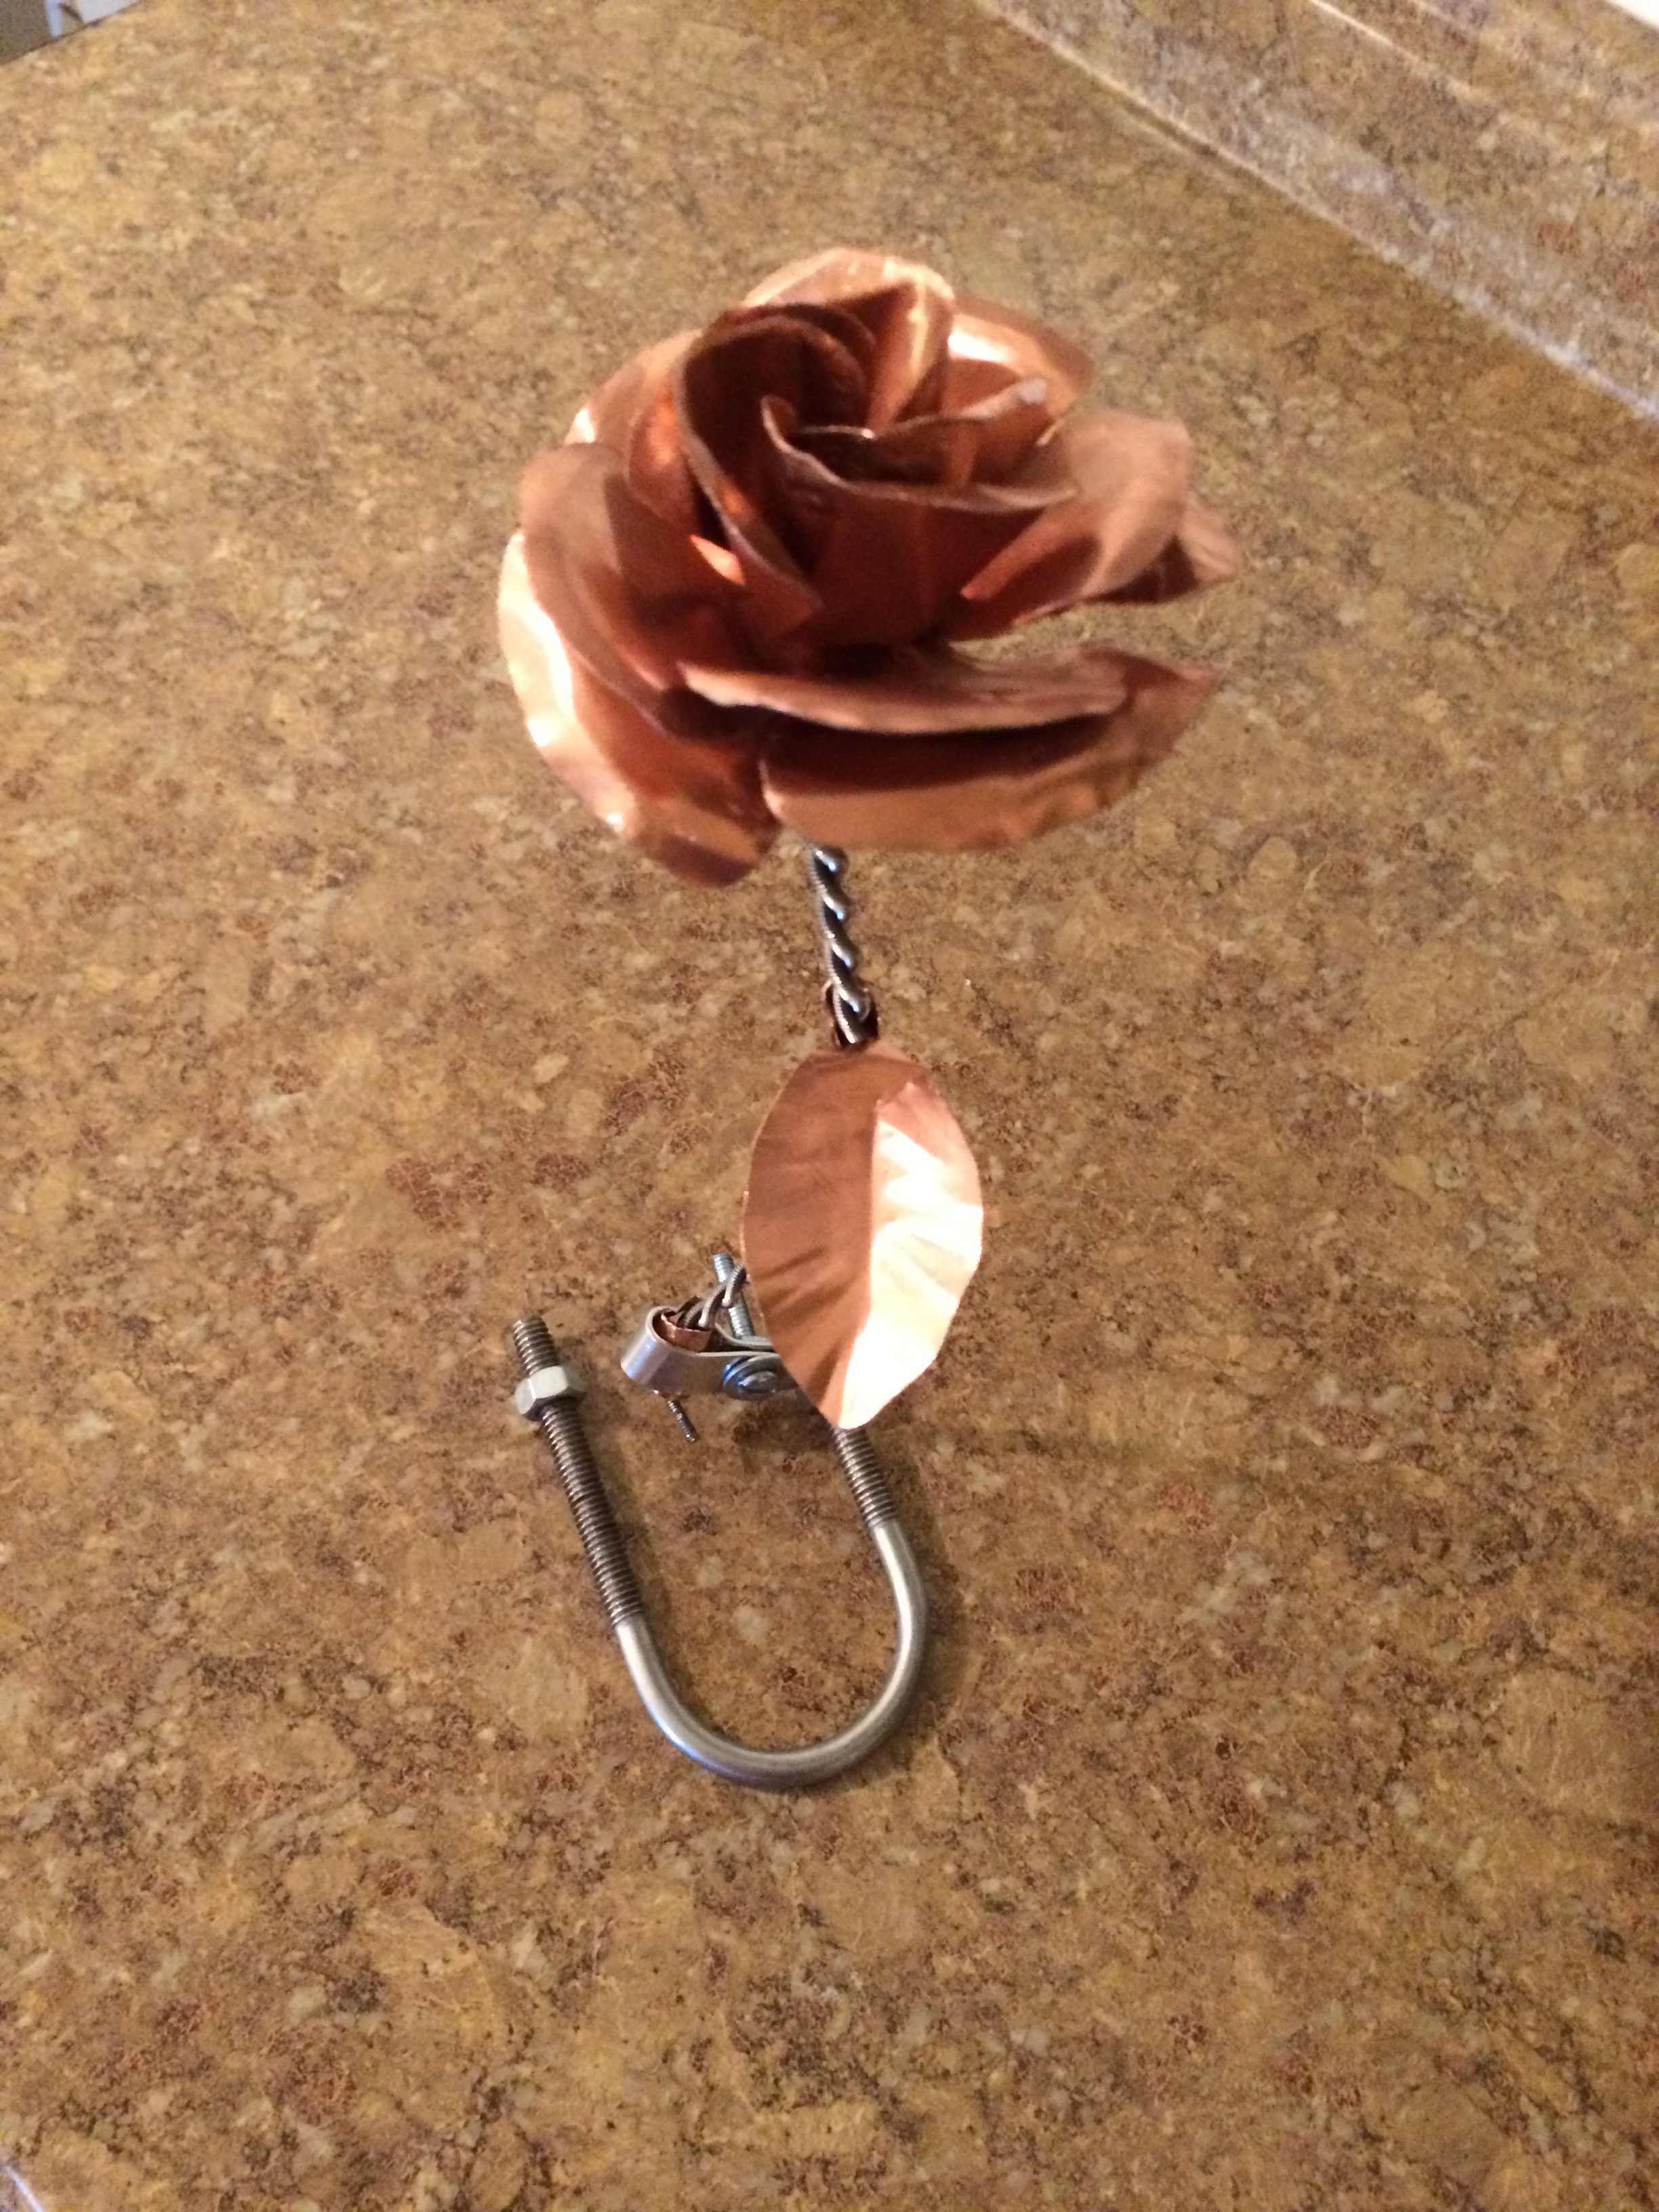
I was inspired by this Reddit post earlier this year and made a copper flower. It turned out really well the first try. I had since made another as a wedding gift (and later for my fiance) and decided to make a steel version for my mom.
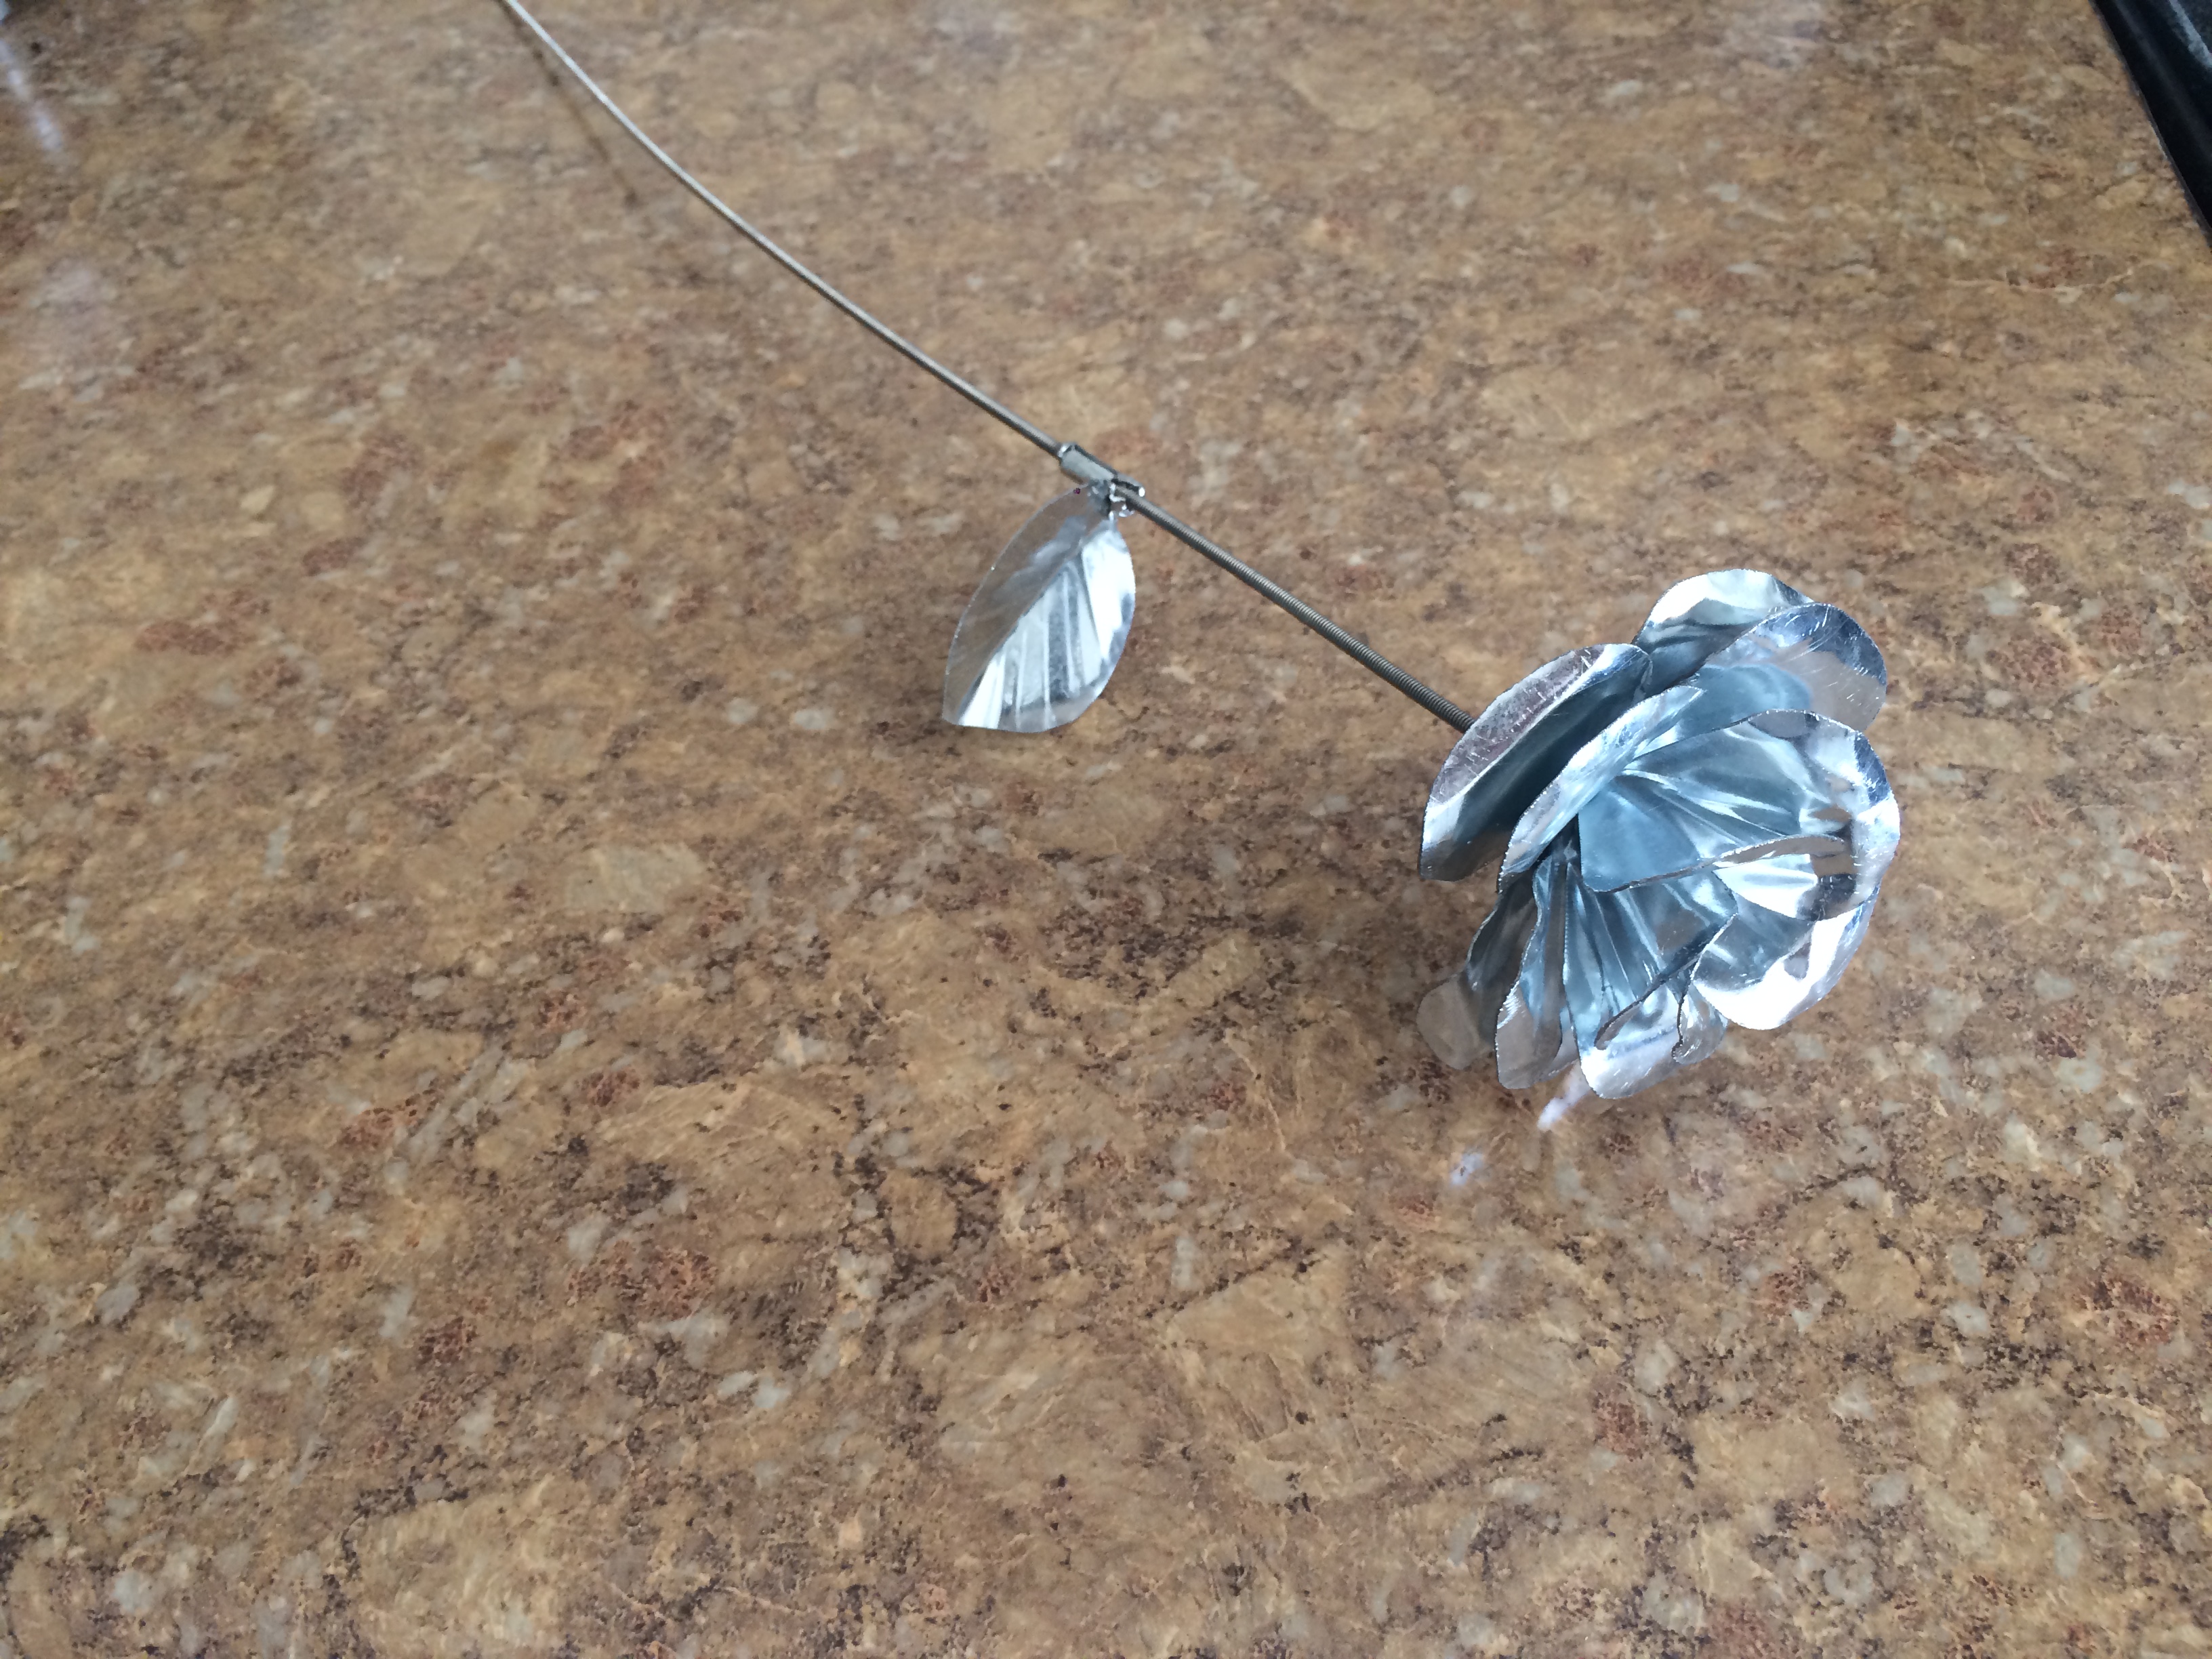
Steel is less malleable, but some plated steel sheets I found at a local hardware shop were really thin and seemed bendy enough. Steel’s also cheaper than copper and alumnimum, and I could go for that all silver-color look. Read through this post before you choose steel though.
Final Product
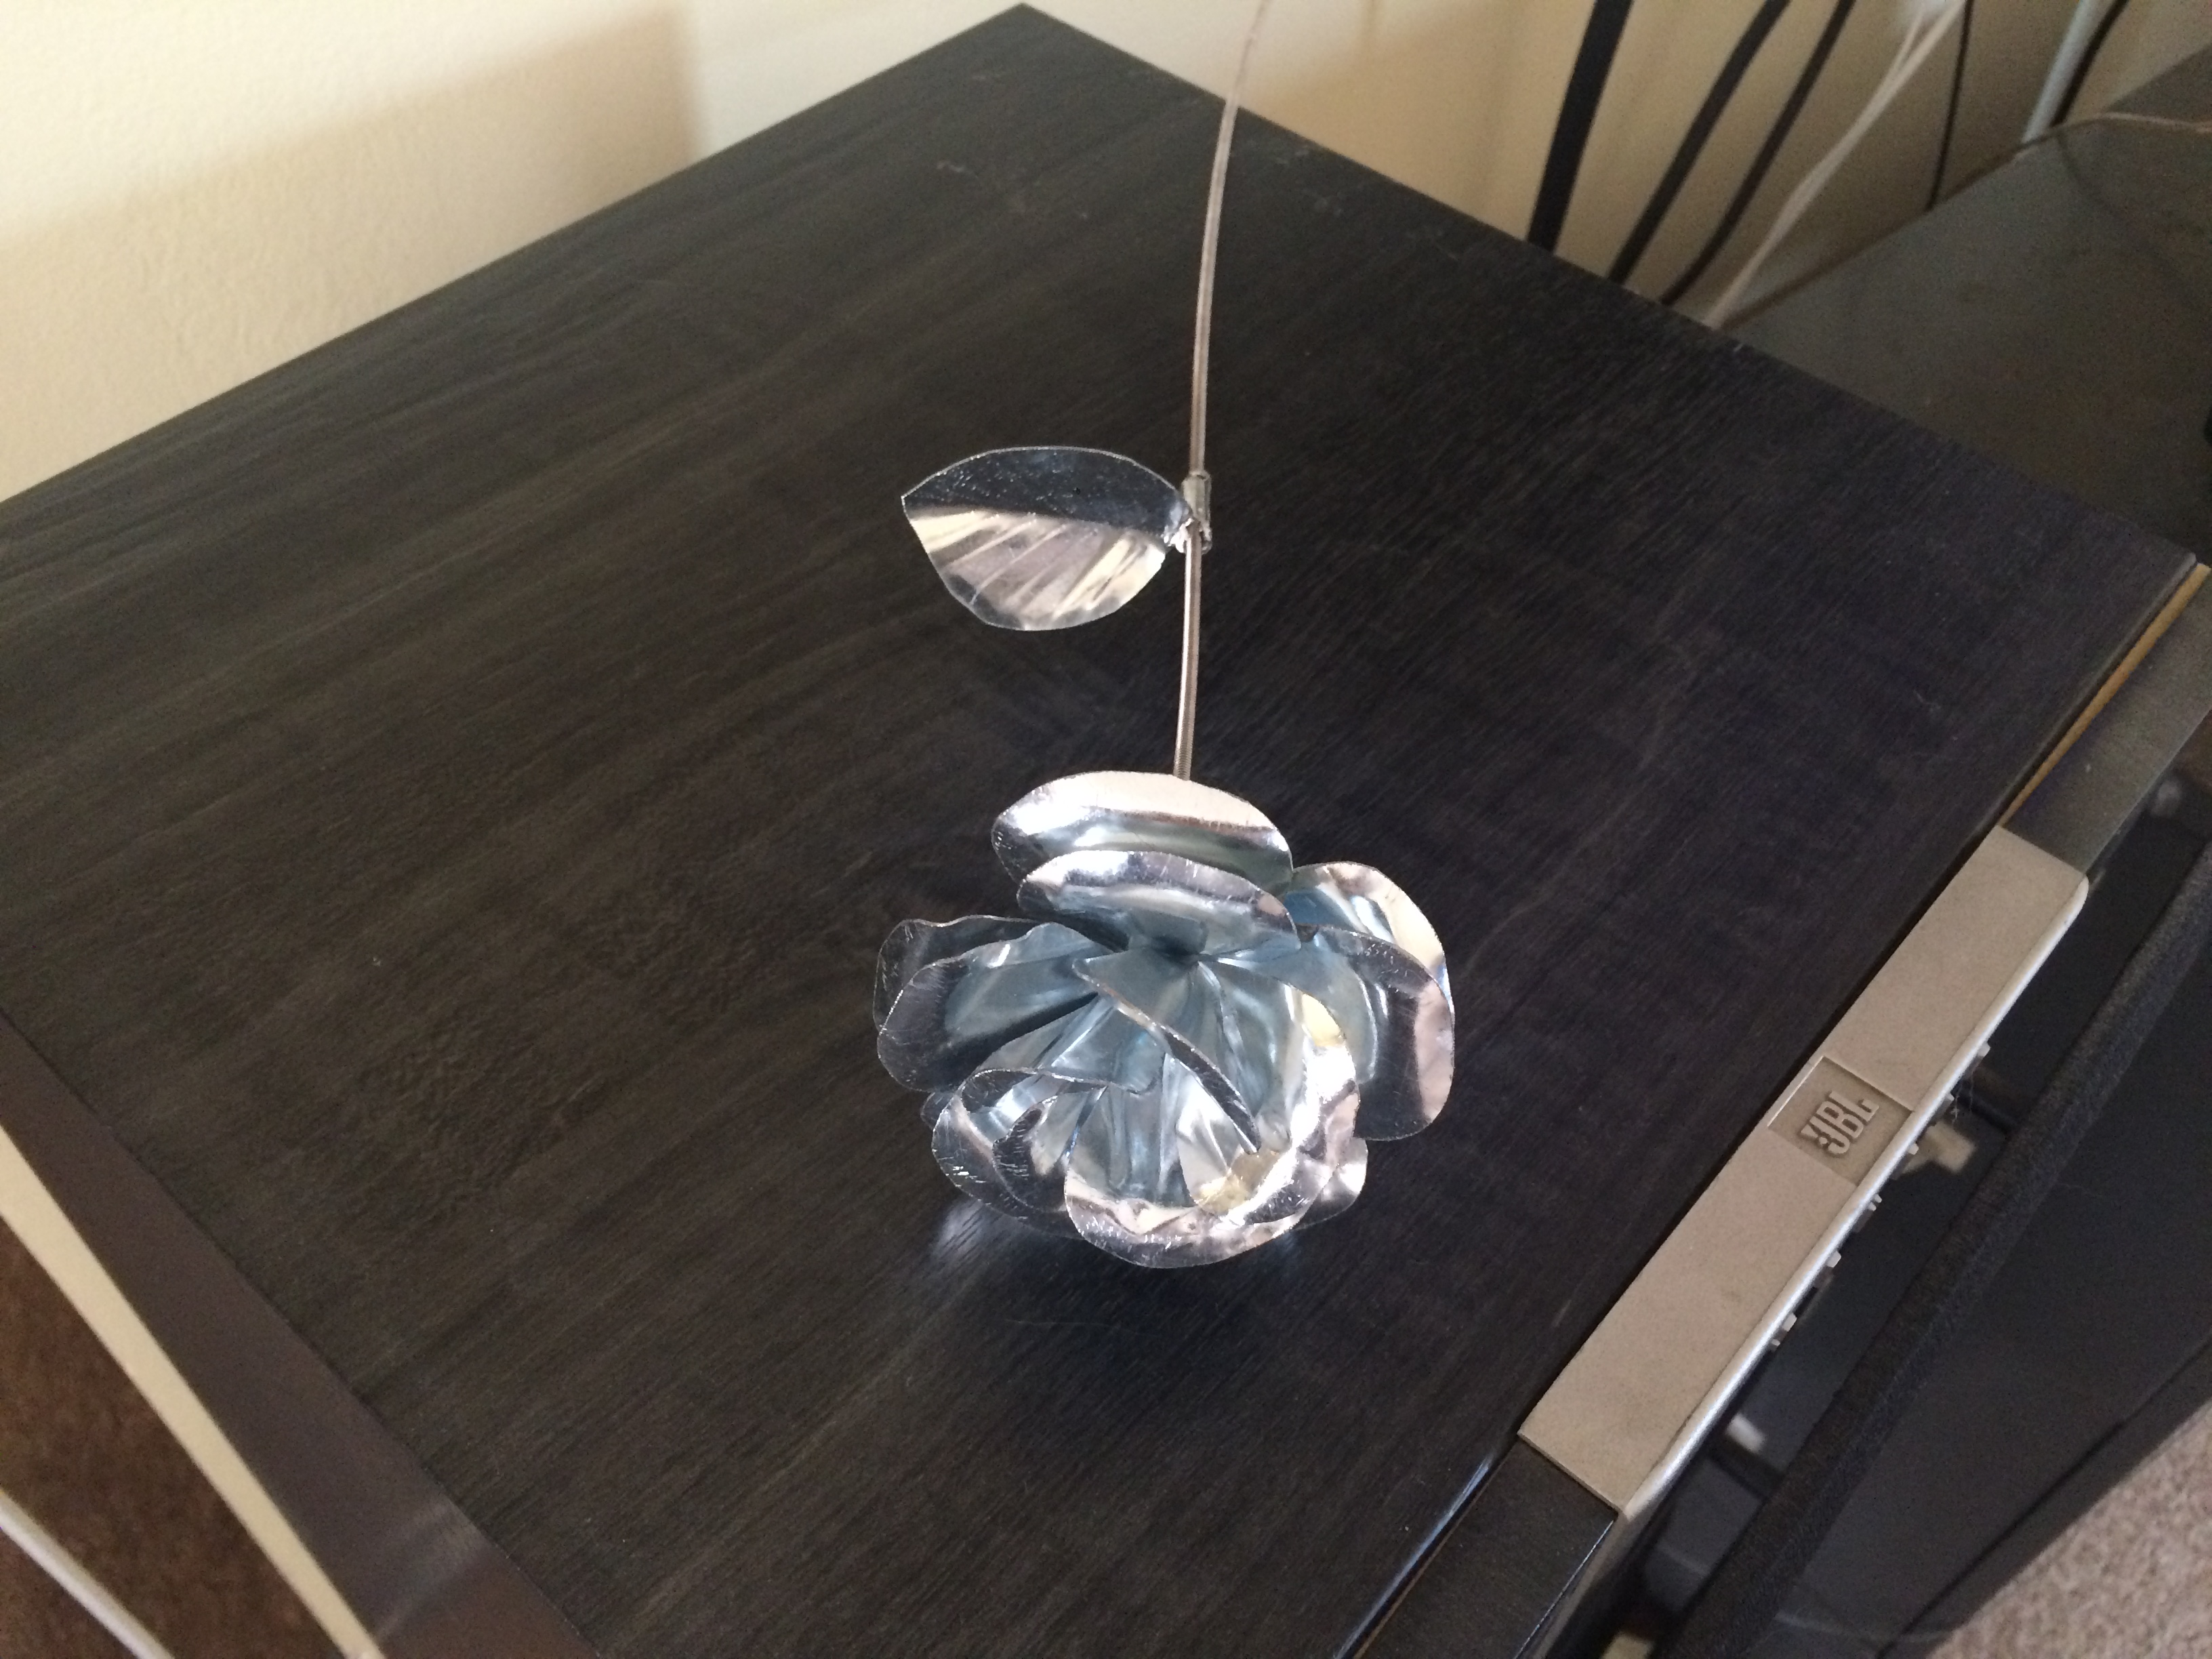
It turned out pretty well I think!
Materials and Equipment Needed
There’s a few different ways to go about creating these, but you can do it with minimal tools! The only electric tools you need are a drill and a Dremel, which is optional, but really helps.
Here’s some of the stuff:
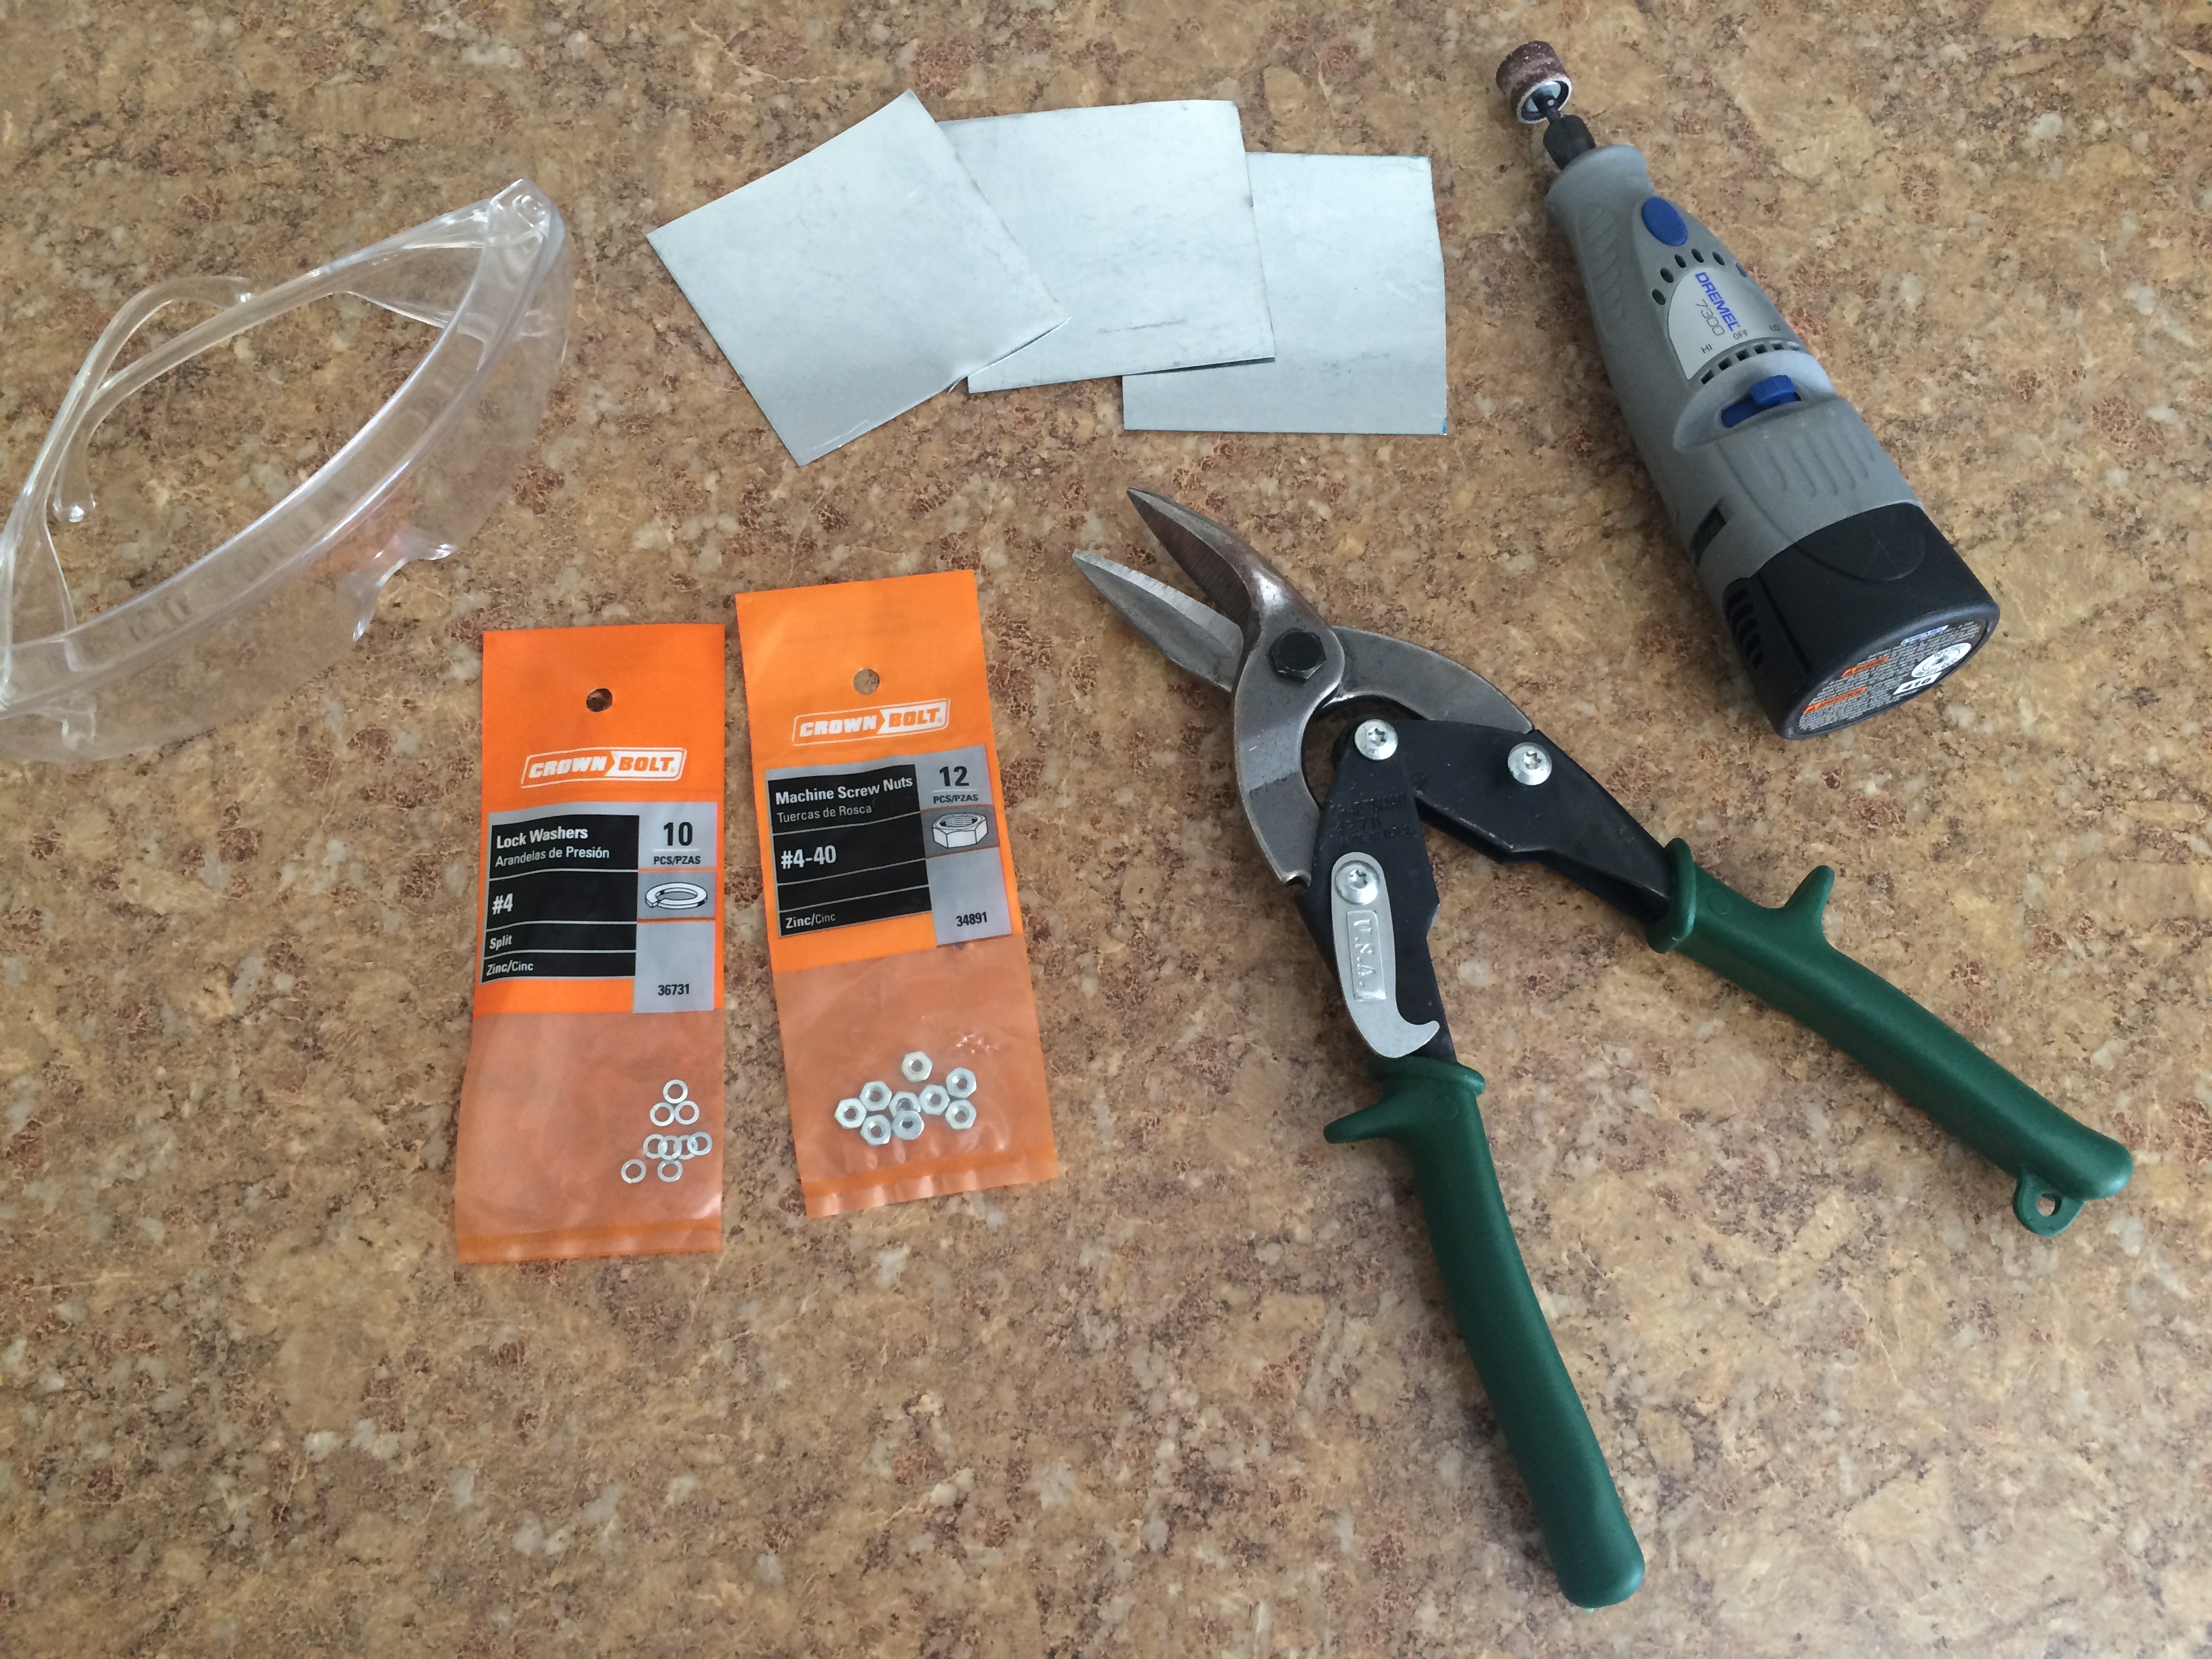
Three 3”x3” squares. Cut those beforehand using those metal plate shears you see. Those happen to be “right-handed” I think. In hindsight, I’m thinking the straight-cut ones would have worked better. If you’re at a hardware store, they’re labeled and generally visually show a curved path left or right or a straight path to indicate the type of cut they do. Either way, the ones I got worked well enough. The “plated steel” was the thinnest I could find. Thinner is better.
There are also some bolts and “loaded washers” (or something like that) that I believe are size #10. Not pictured are some steel rods of the same size that will be used as a stem.
Procedure
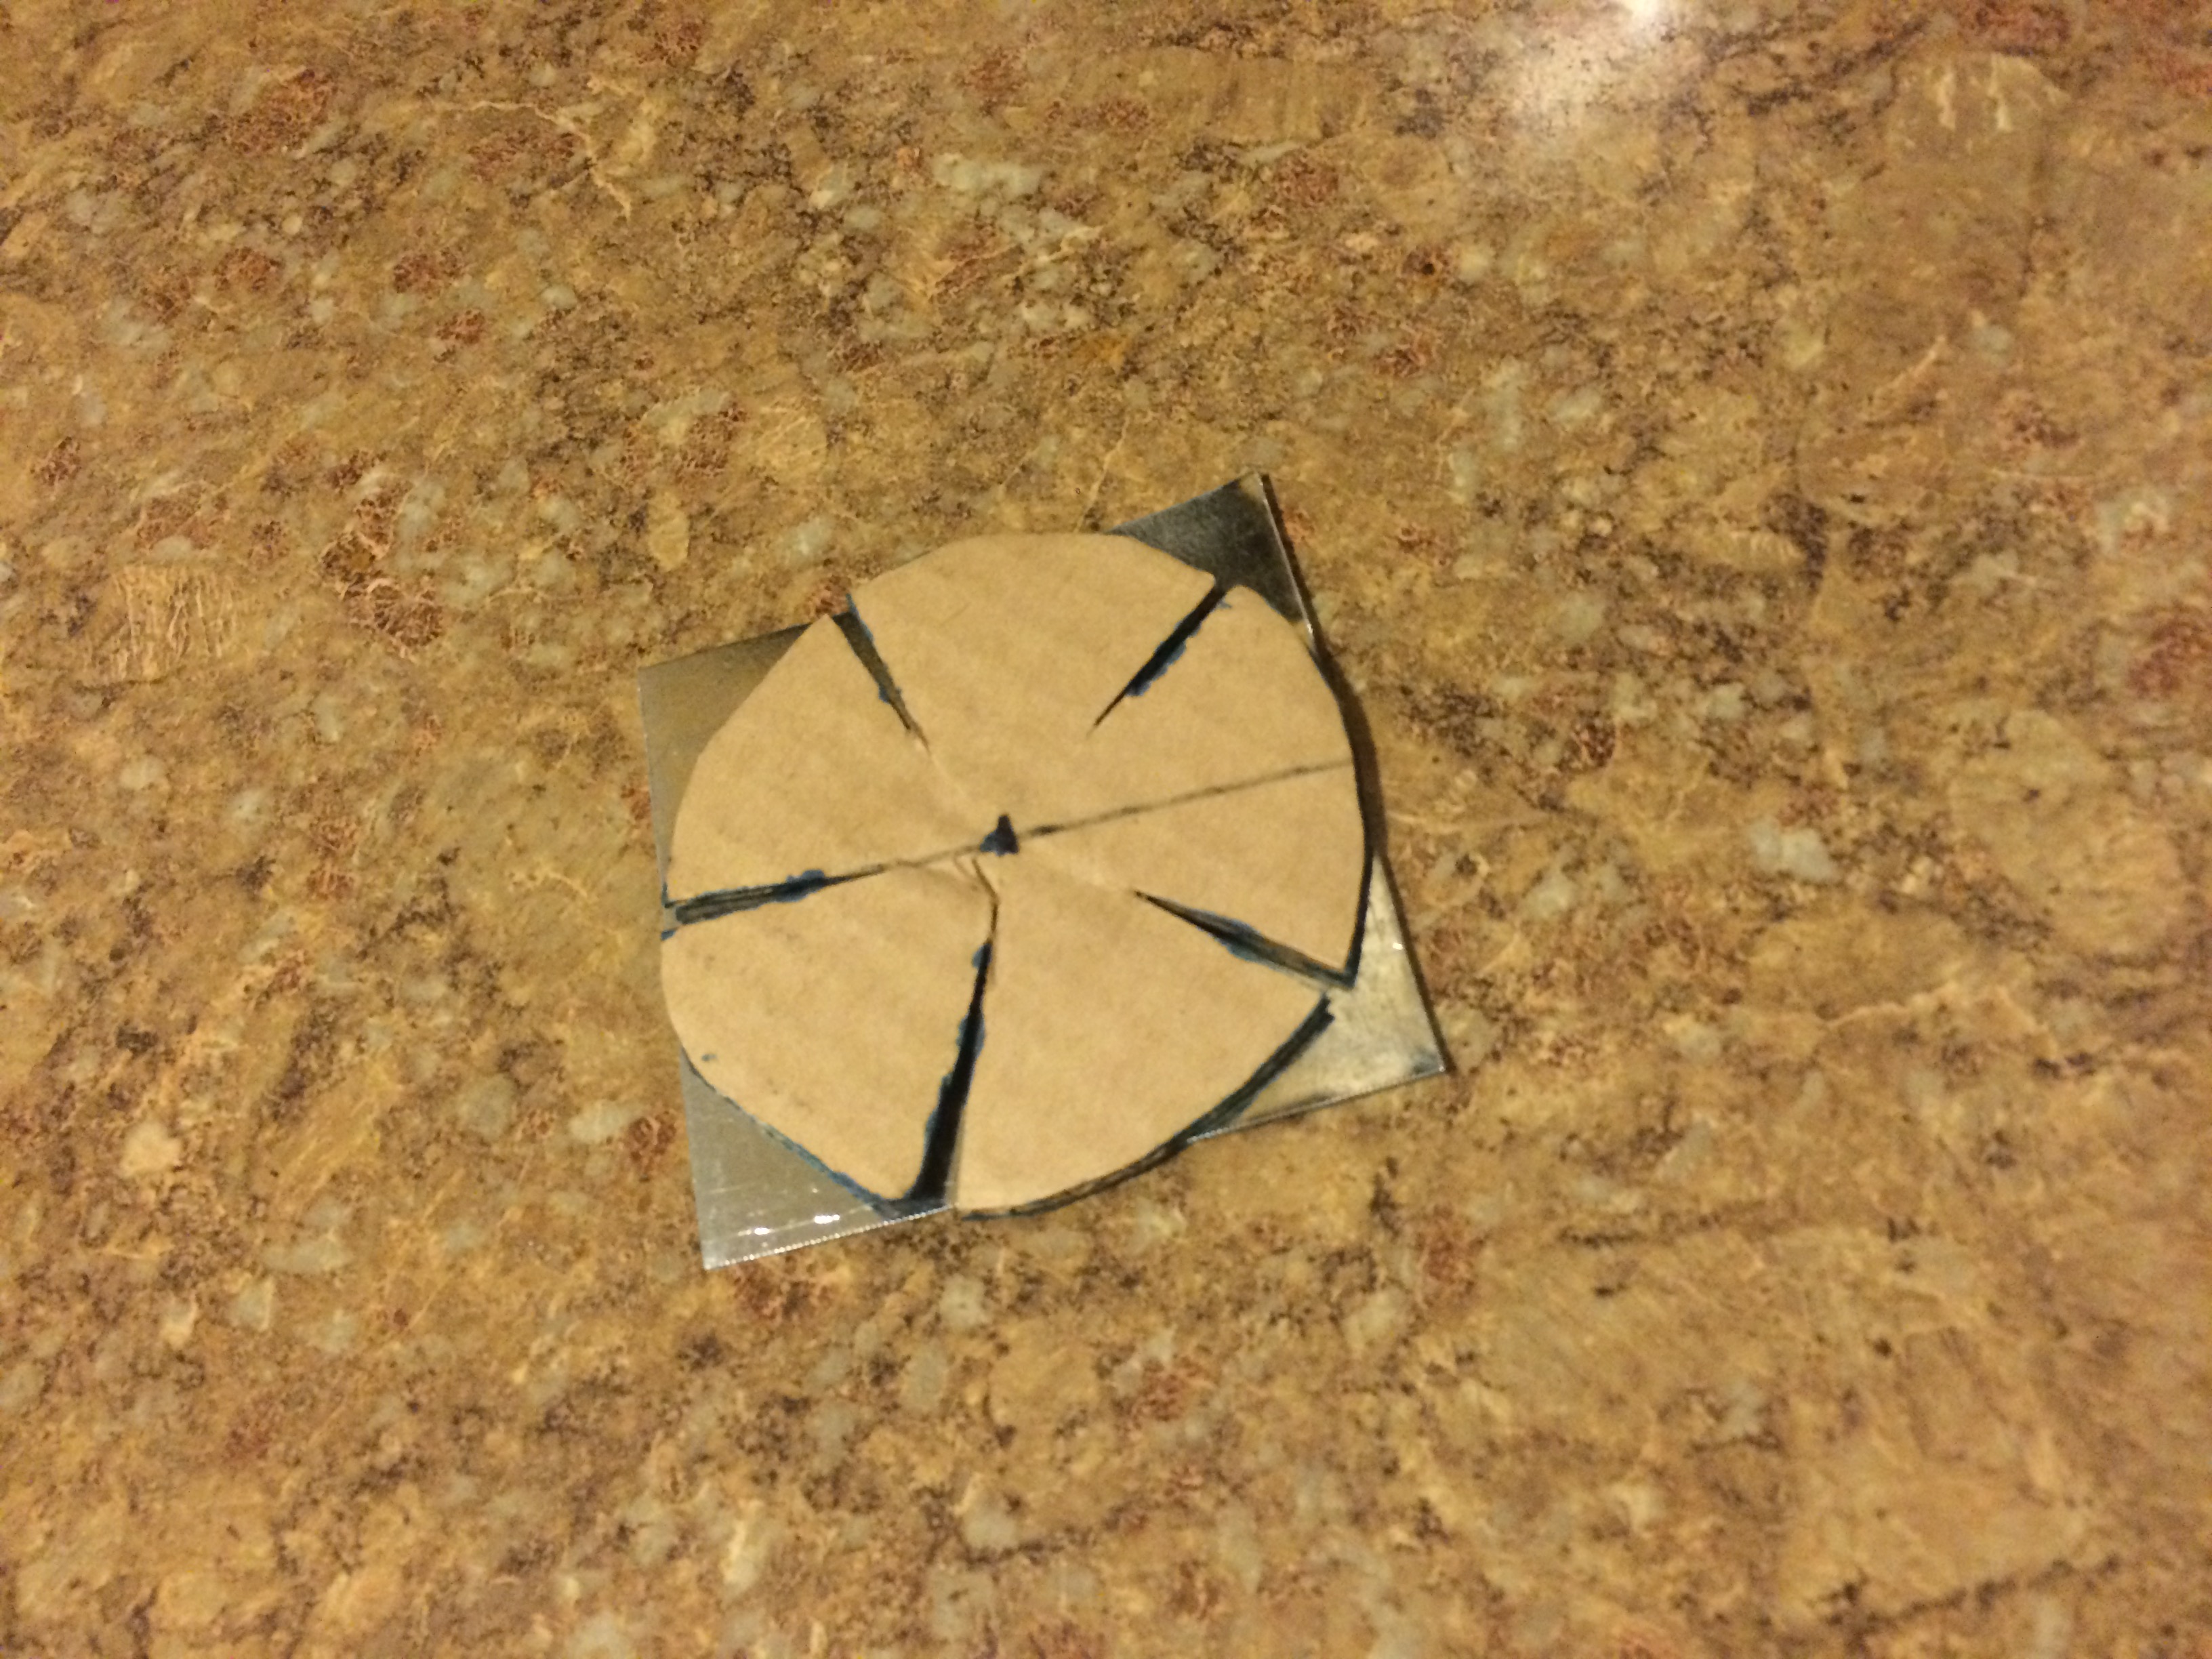
Since I’d done this before, it made sense to use a template to trace out the flower stencil to speed things up. Just tried to cut out a circle in cardboard and eyeball 5 even petals. Then I traced out the stencil with a dry-erase marker on each square.
Cut those squares into flower shapes with shears. Then use the Dremel to round off the petals’ edges and remove sharp edges. I suppose this could be skipped if you shear them well and don’t mind if there are sharp areas. Sorry, no pictures of this.
Before shaping the petals, drill a hole in the middle of each one. Match the size of your rods.
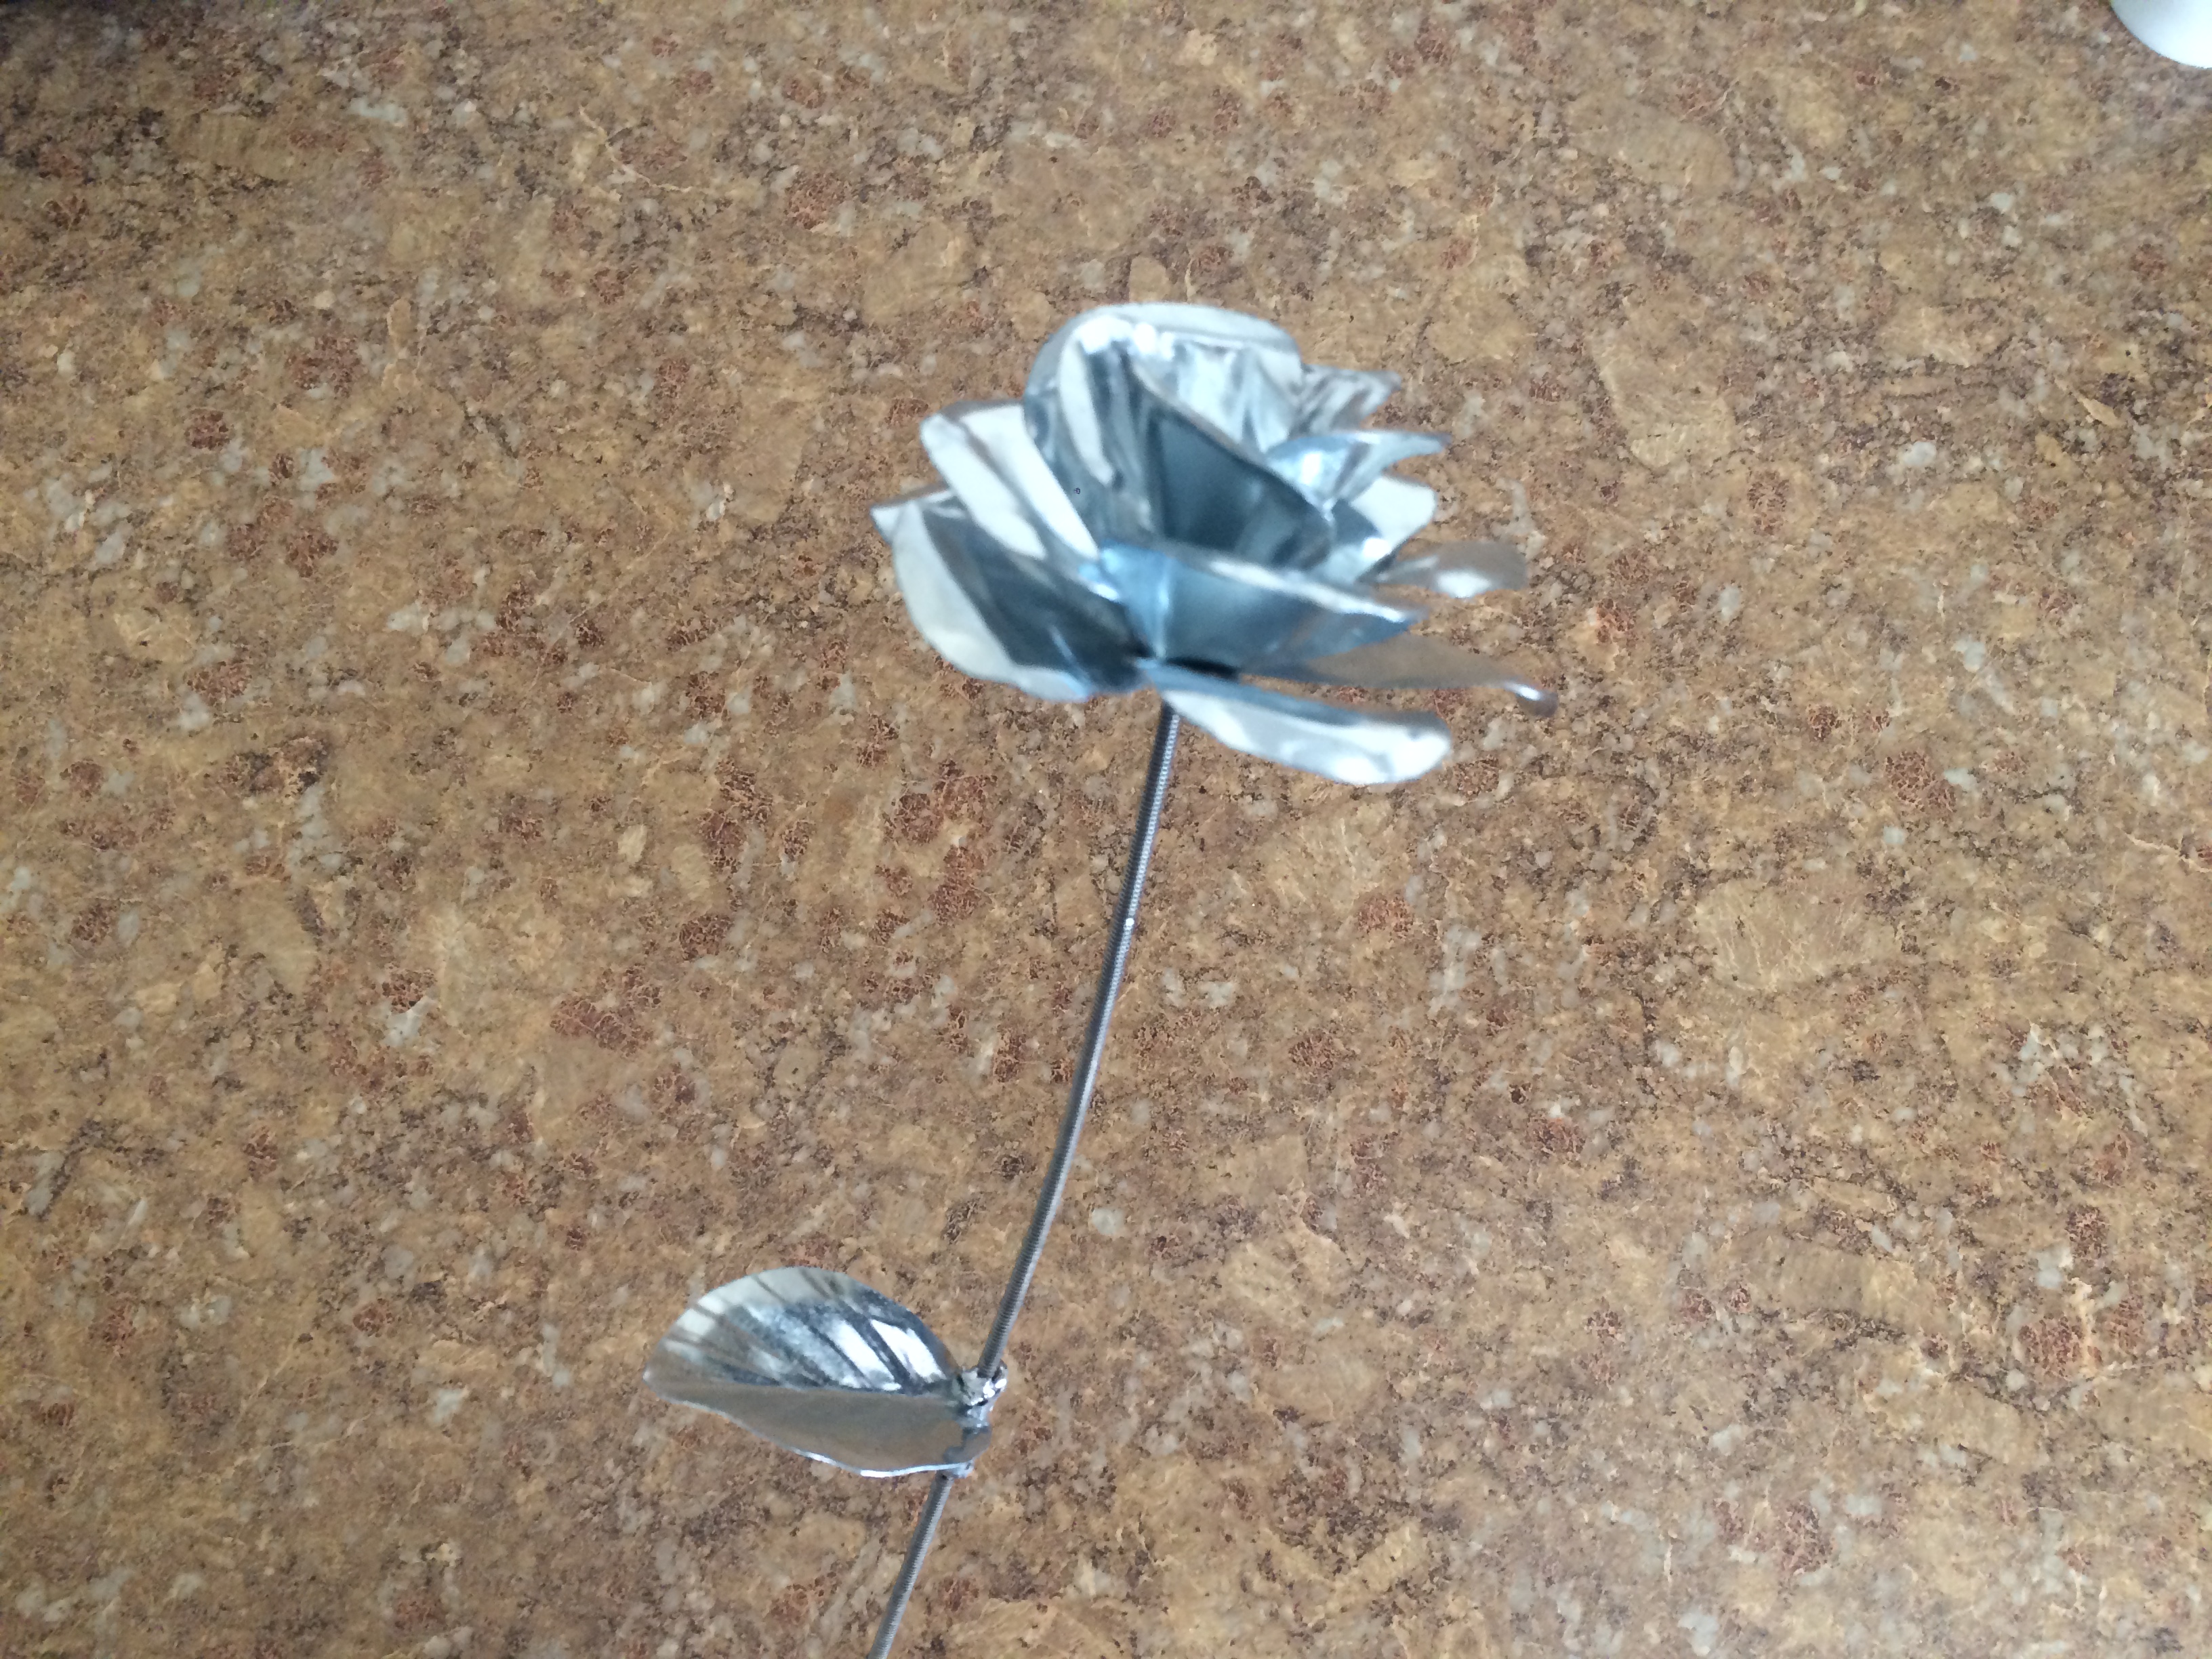
Now “shape” these stenciled-out petals! I just used needle nose plyers for this - they work great. I don’t know if there’s a way to describe this easily. Look at the final flower though, and let that guide you. You’ll want to bend the edges of the petals downard, but bend the whole petals upwards. Whichever set of petals will be at the top should be bent almost upright. For these, curve them inwards as well as the inside of a flower looks. This is where the issue with using steel came up. Shaping the petals edges was fine, but when I tried to curve the inner most petals, I accidnetally made distinct bends that showed. When I used copper, it was easy to curve them uniformly. When the flower was all put together, I think it looks fine, but copper did contour better, and I suspect aluminum would too.
Now place a bolt and washer on the end of a rod. Give enough space for the three sets of petals and another screw. A little extra room doesn’t hurt - it’ll be mostly hidden. Cap with another washer and bolt. The first time I did it I didn’t use these, and the bolts would slip. The washers really help.
Anyway, get those tight. Now continue shaping the petals until it looks like a flower! It doesn’t take much.
I also added a leaf, but I don’t have any pics and can give some insight into making those later if anyone wants. Ended up soddering this somewhat since the steel was difficult to “wrap”, unlike the copper one I made originally.
Finished
Let me know how it goes, and I’m happy to answer any questions. Here are some more pics:
Some pictures of the copper version
 So coooool